We recommend starting with only the Retail Price List. Since you can manually enter prices into Step 6, getting your Materials and Finished Edges will let you start quoting before you enter any prices into your Price List. This article details the most essential edits to your Price List as you begin.
After making changes, be sure to save by clicking the Save icon in the upper right corner.
EDIT PRICE LIST
To add Material and Finished Edges you'll need to enter Edit mode in your Price List.
ADD MATERIAL
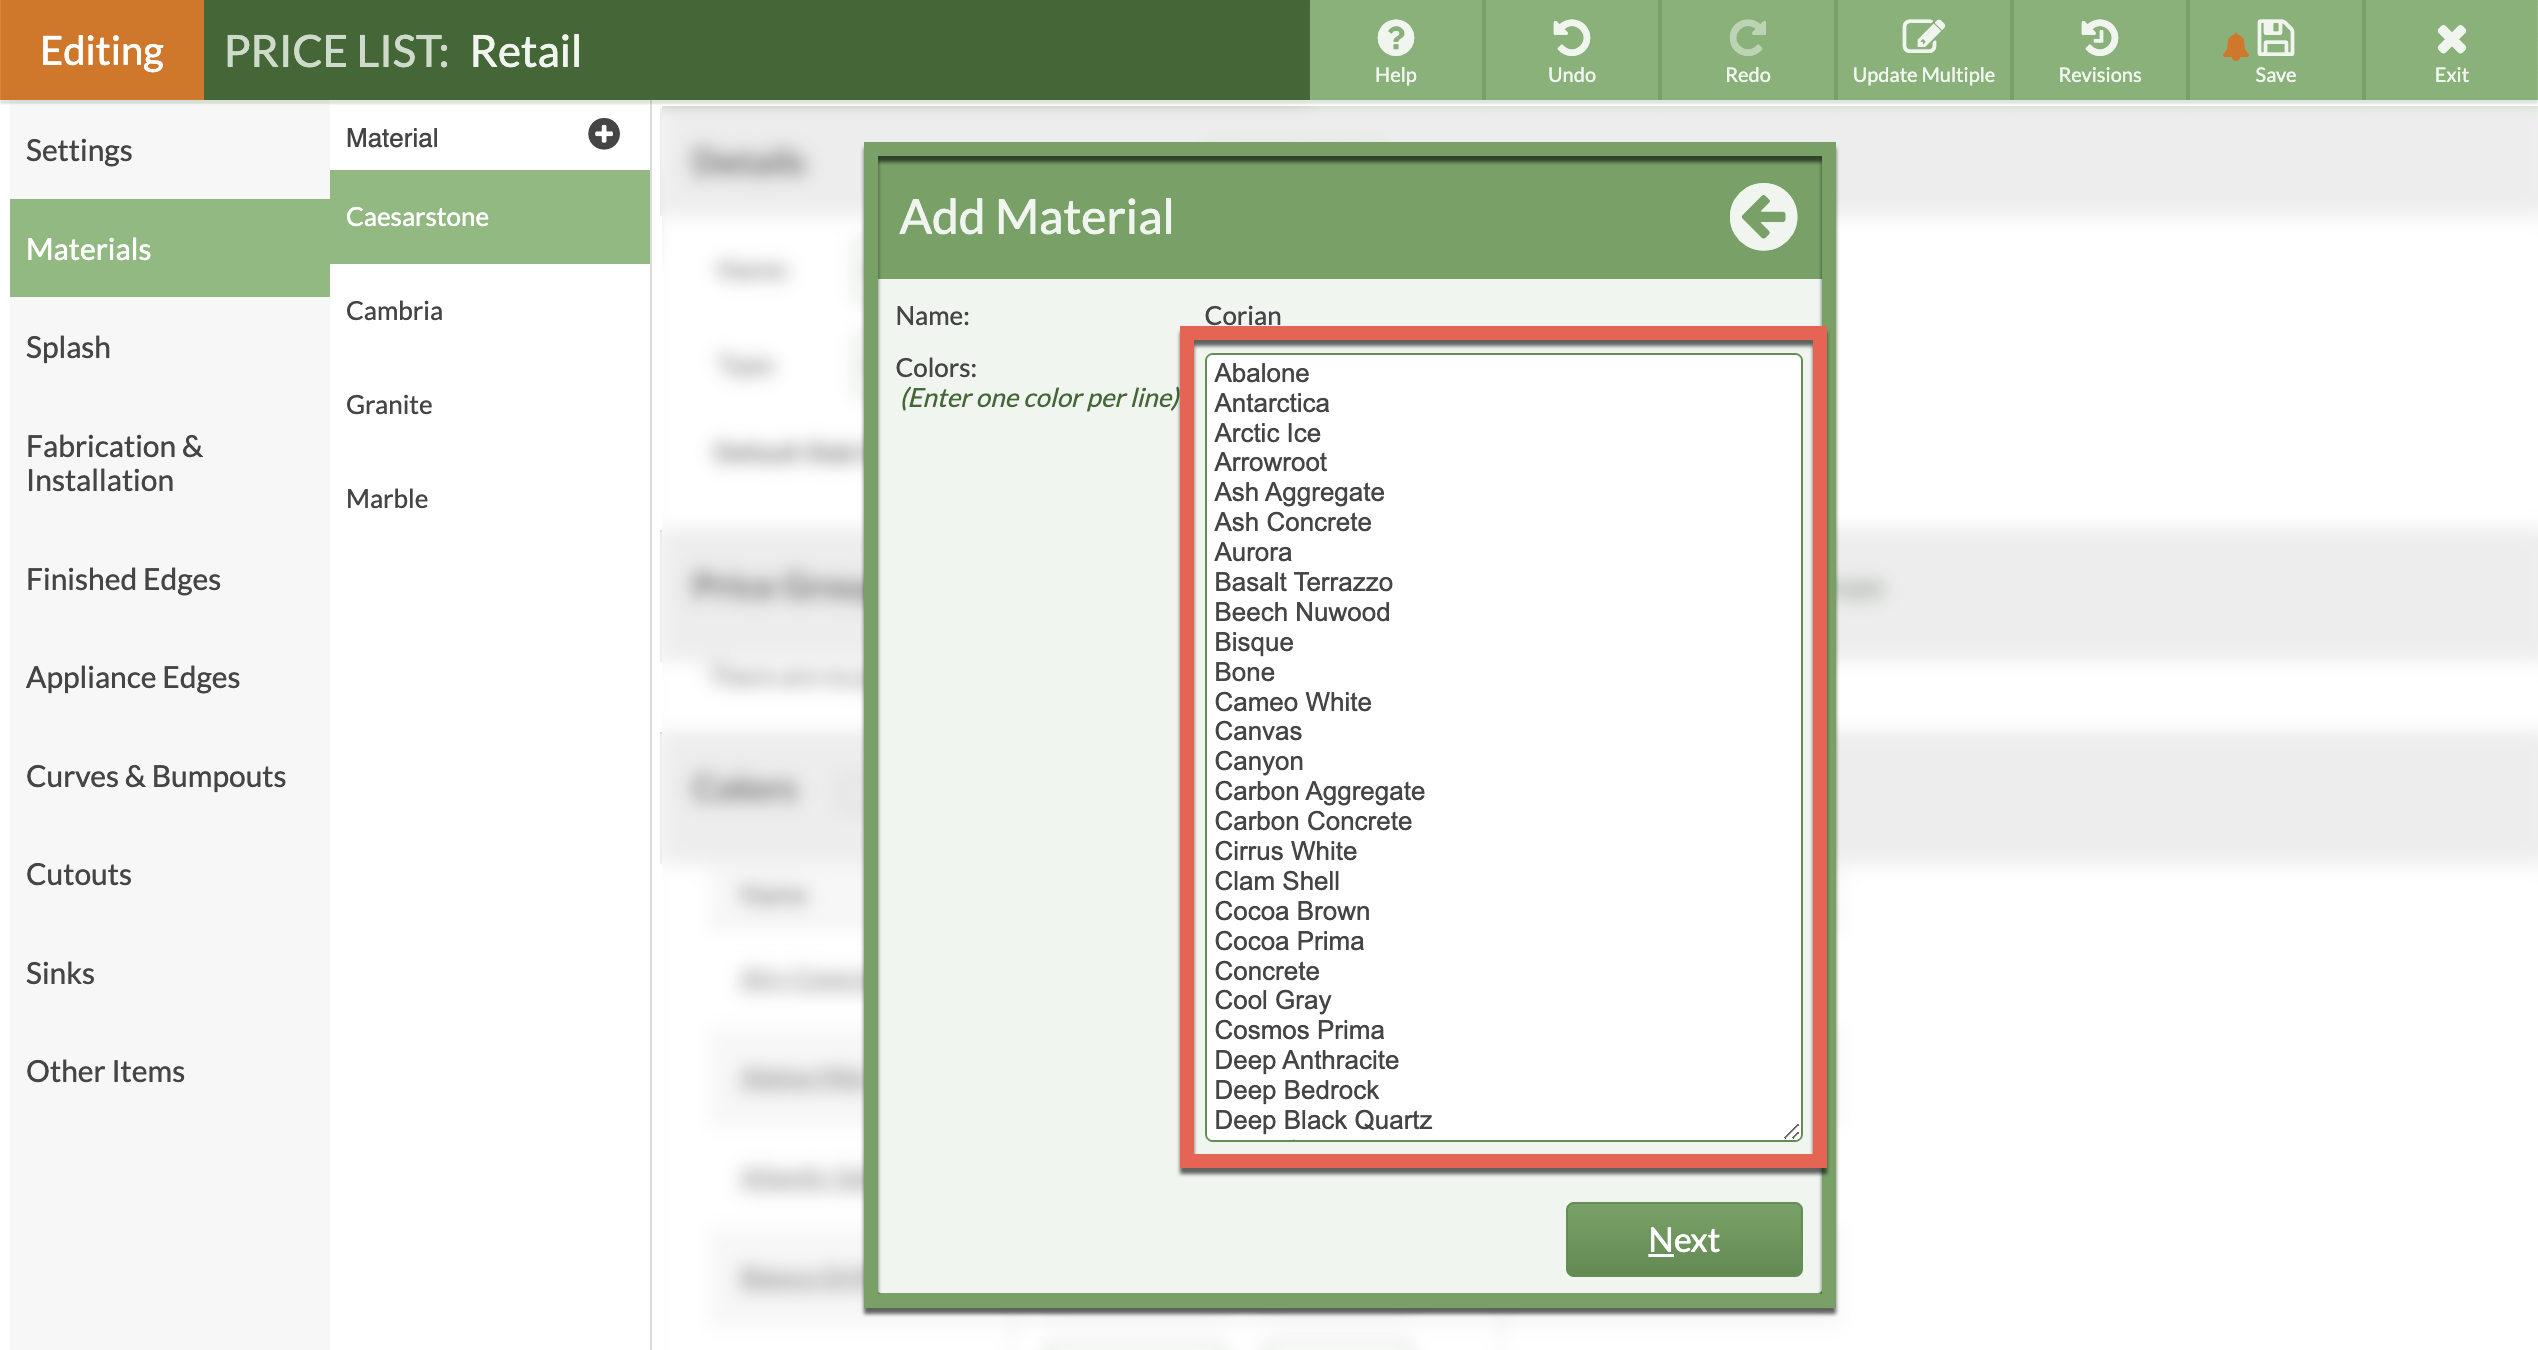
CounterGo is preloaded with Material colors to choose from, which you can edit. If the Material you're looking for is missing from the list, you can create a Custom Material and add the Colors manually, one per line.
ADD FINISHED EDGES
CounterGo has many standard Finished Edges to get you started. You can add more edges along with a thumbnail image of the edge profile.
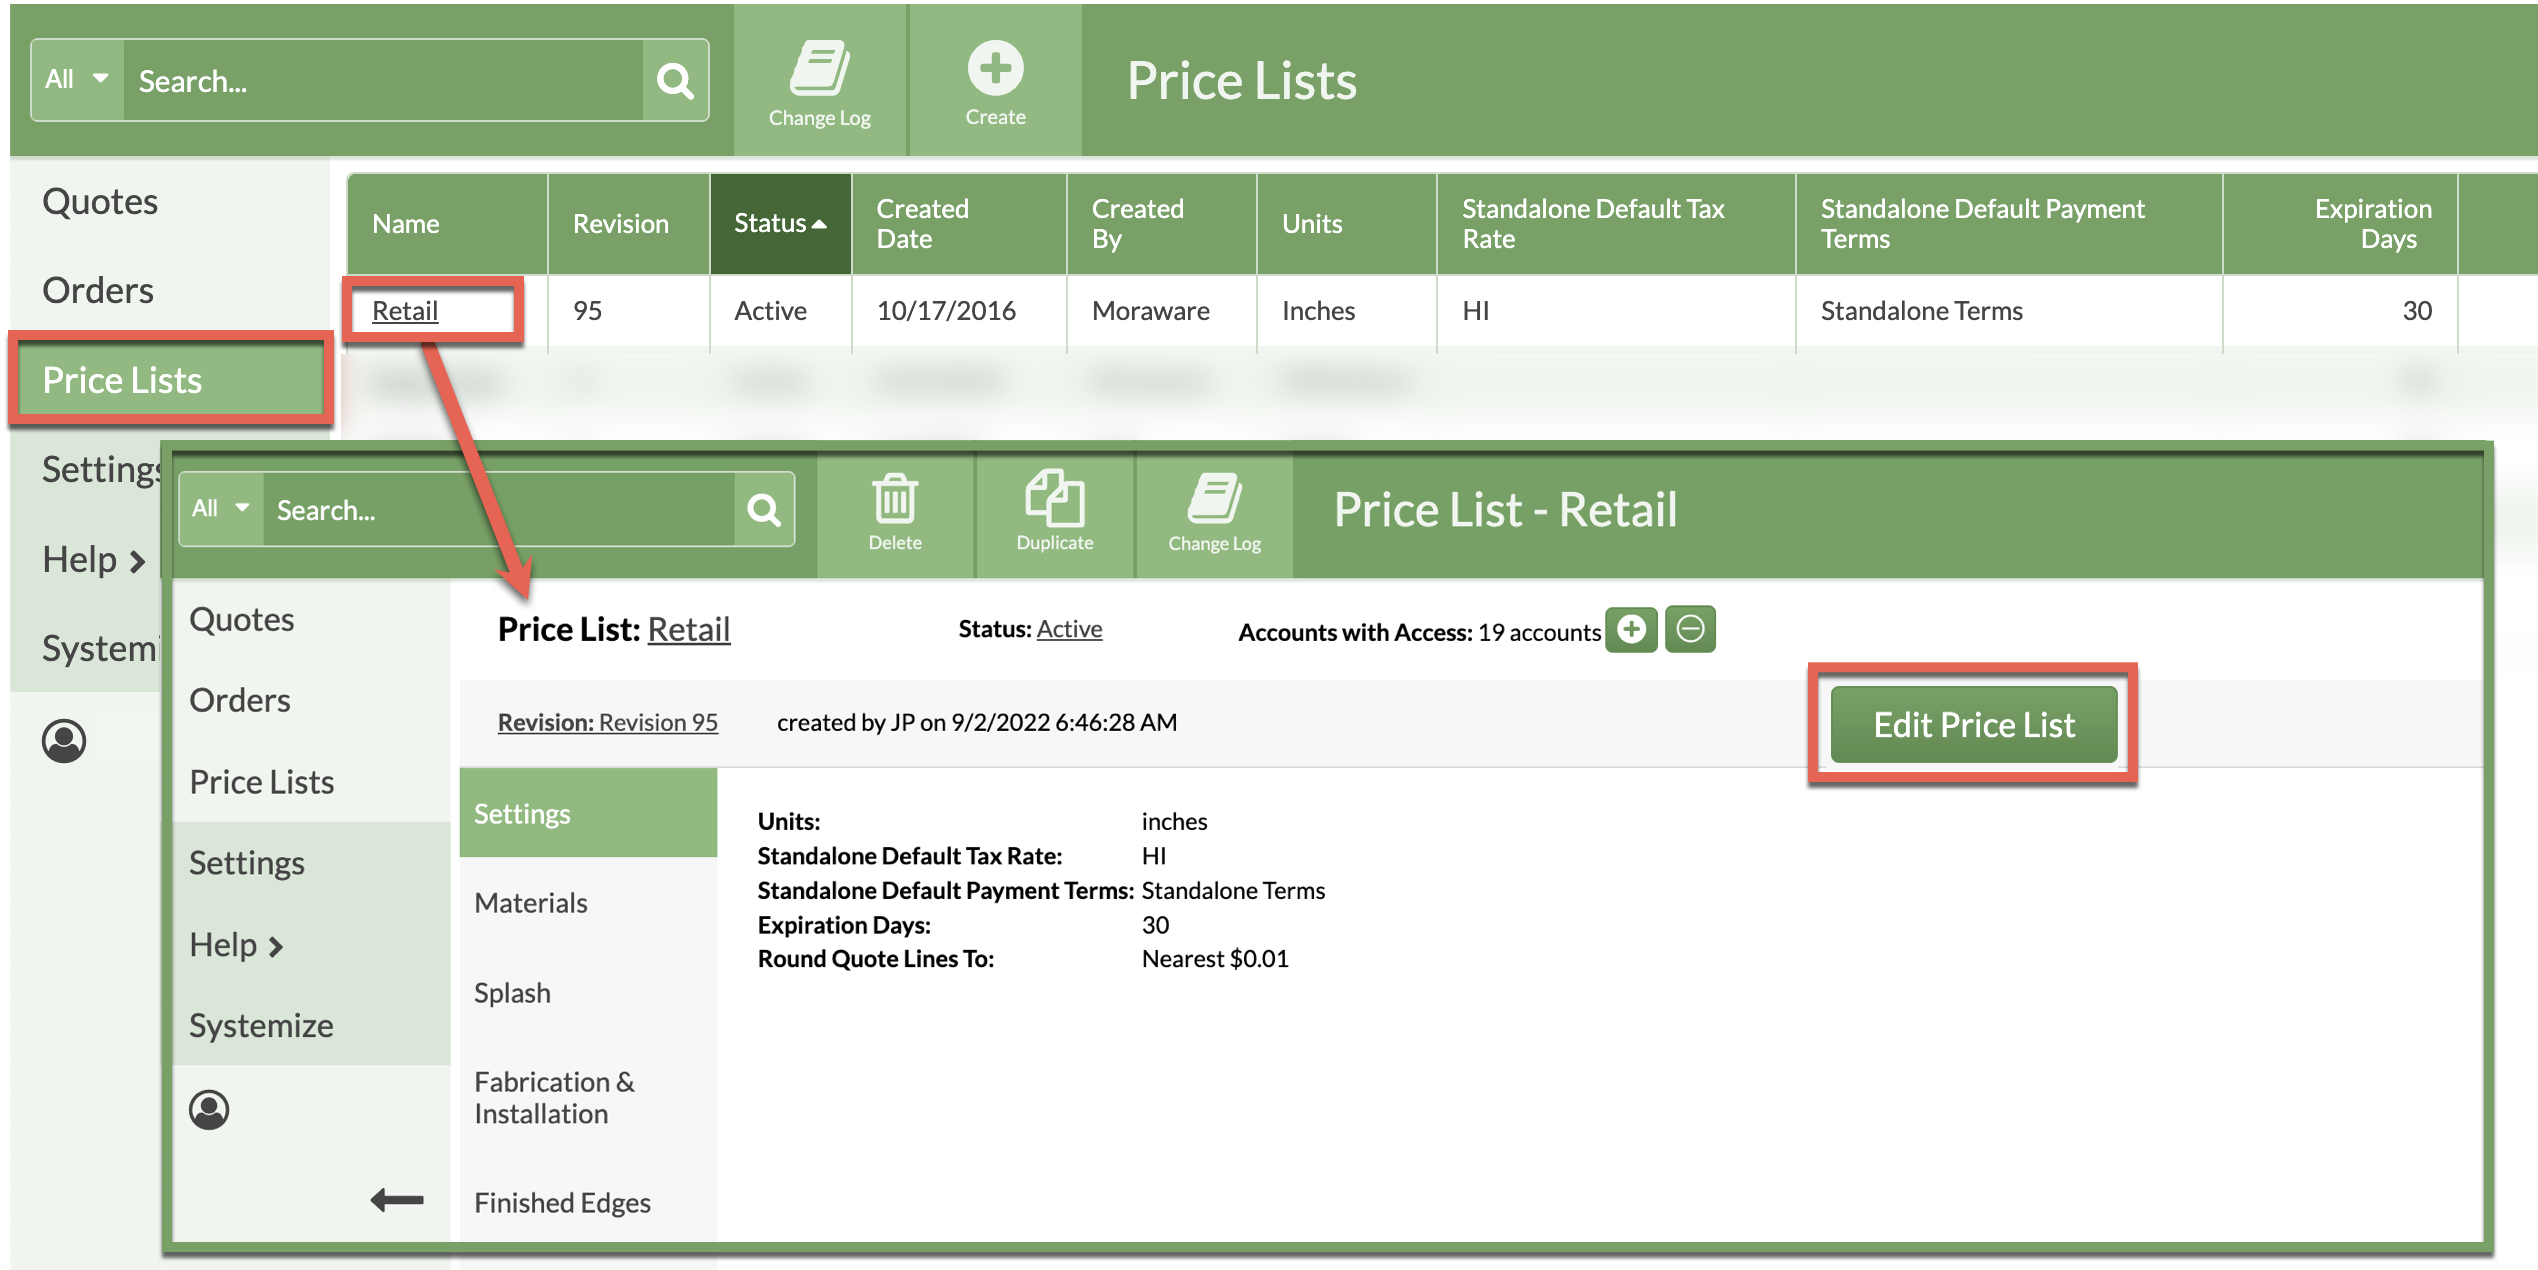
EDIT PRICE LIST
- Go to Price Lists.
- Click the Retail Price List.
- Click the Edit Price List button to open edit mode.
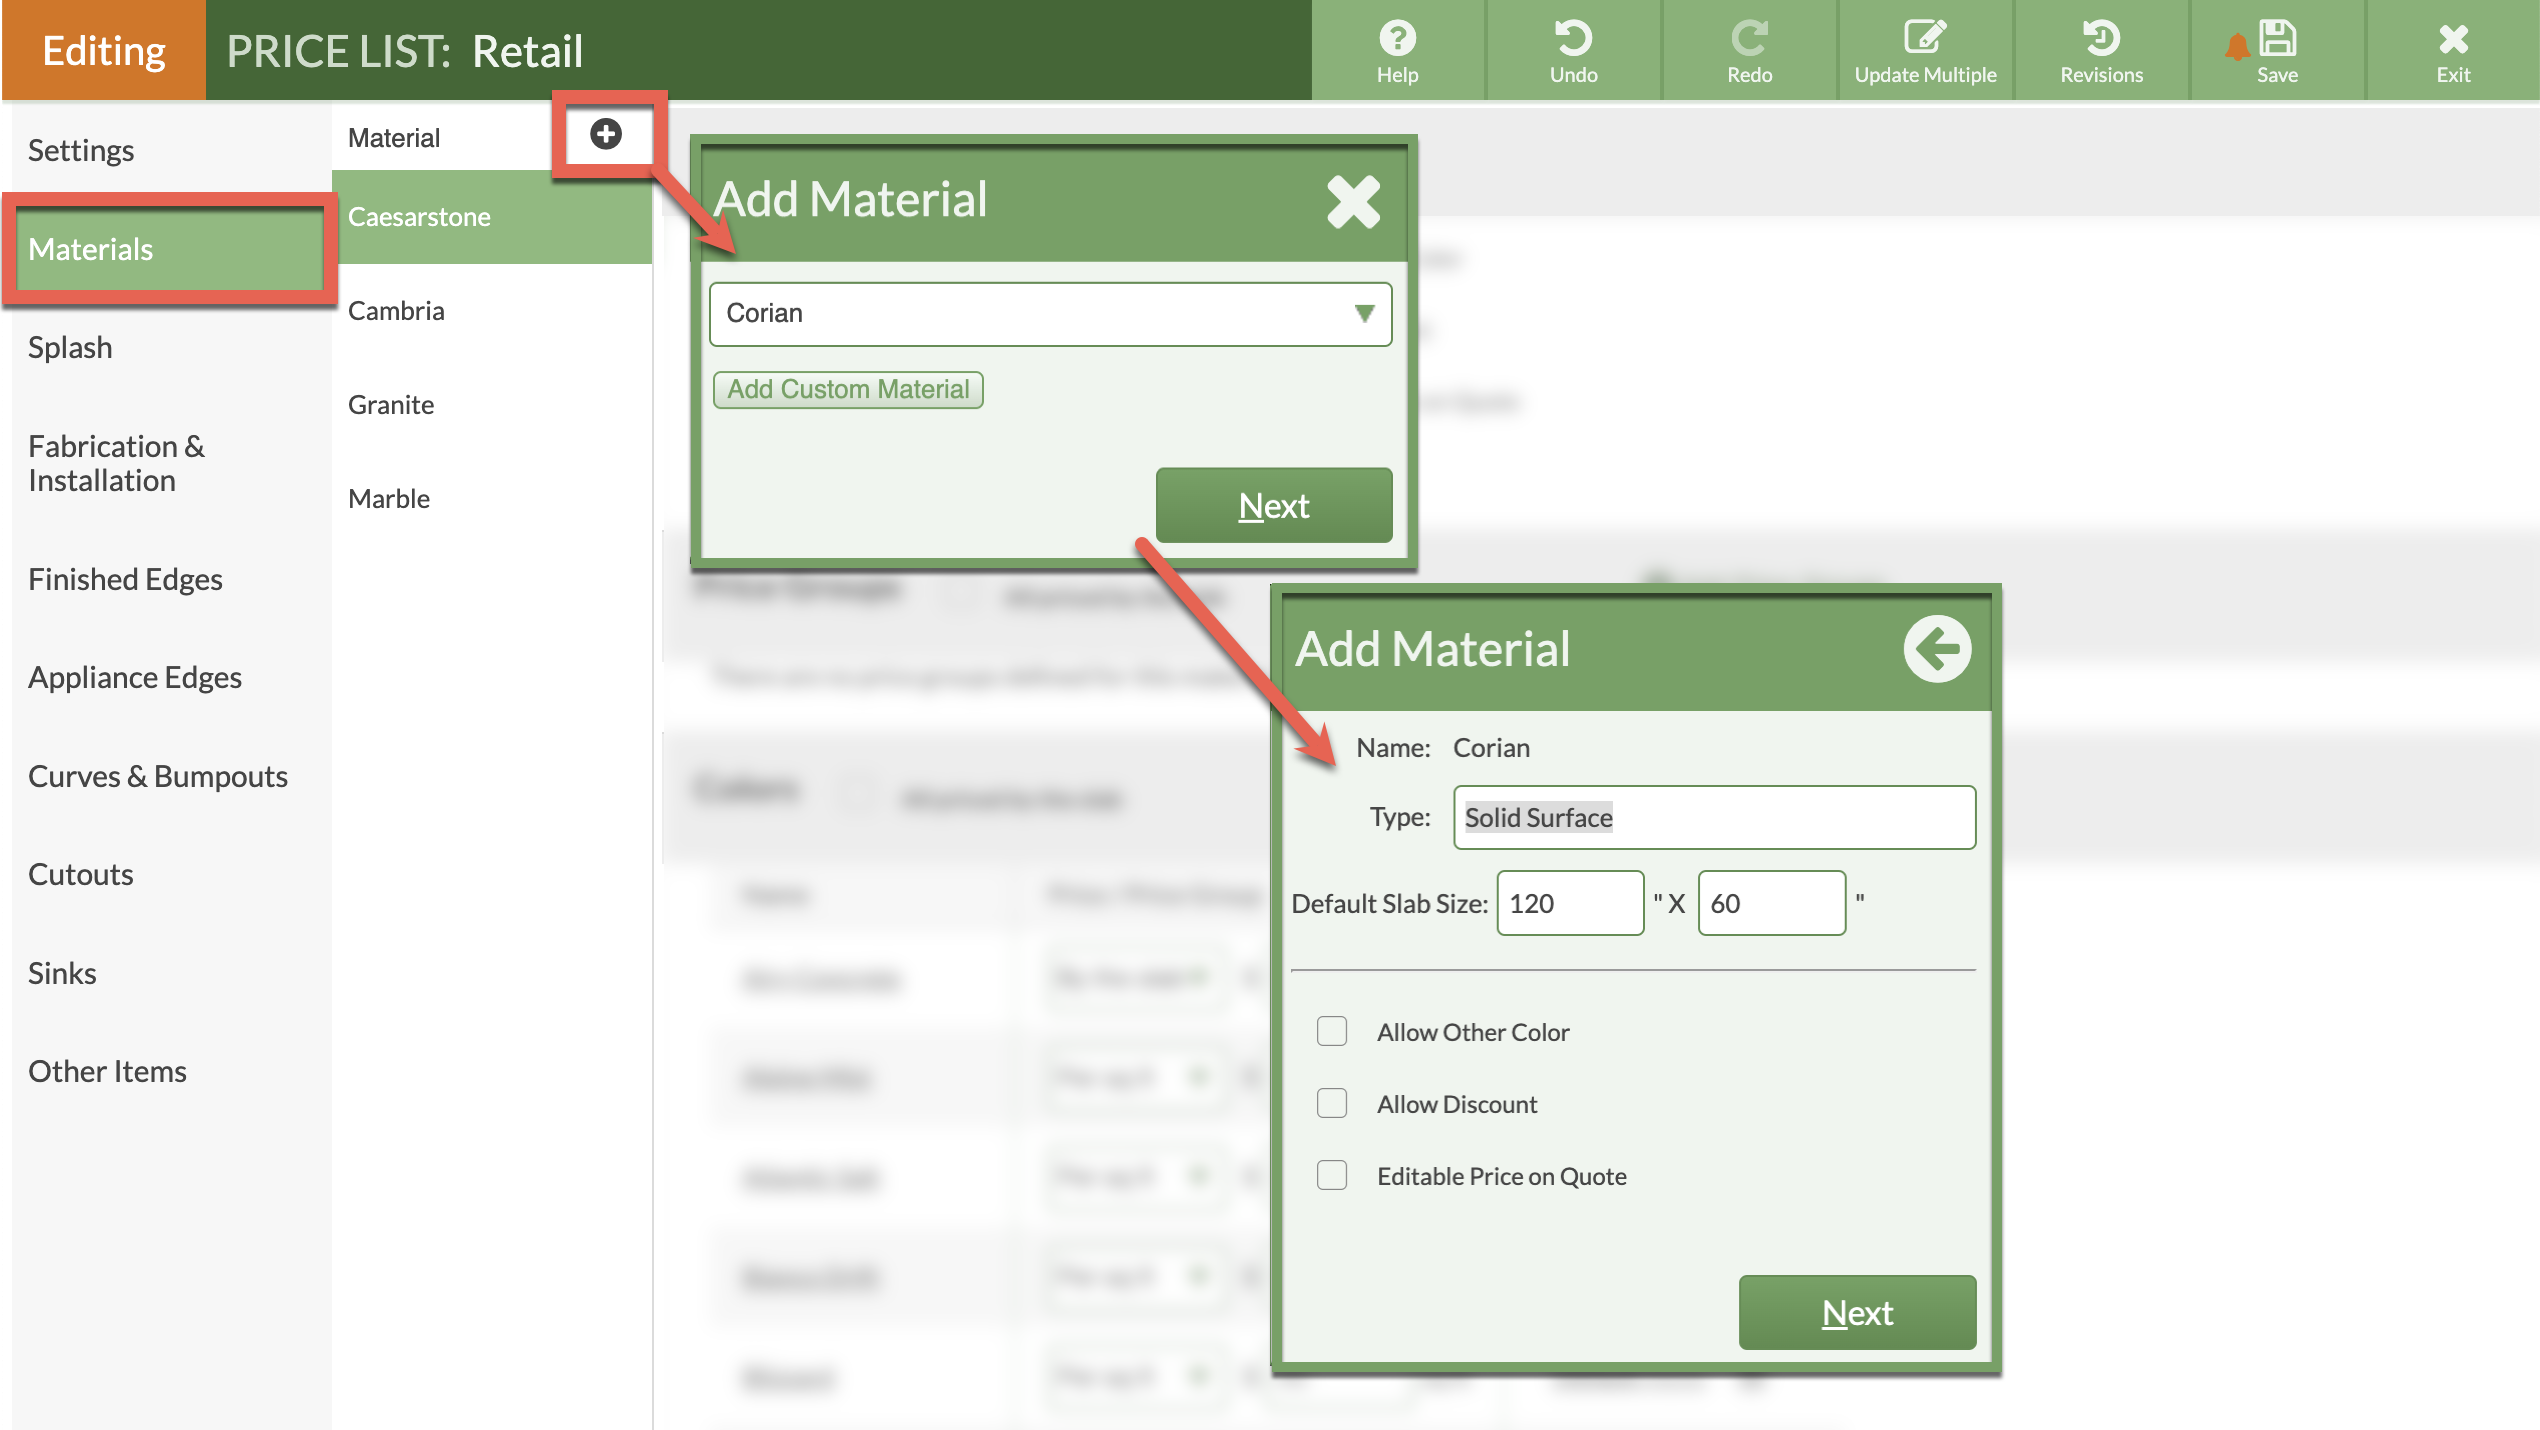
ADD MATERIAL
- Click the Add New Material icon at the top of the Materials sub-menu.
- Select a Material from the dropdown menu or create a Custom Material.
- Enter the Type if blank, and Default Slab Measurements.
- Make any additional selections form the listed options.
- Add or delete Colors if needed, one per line. Colors can be added or deleted later as well.
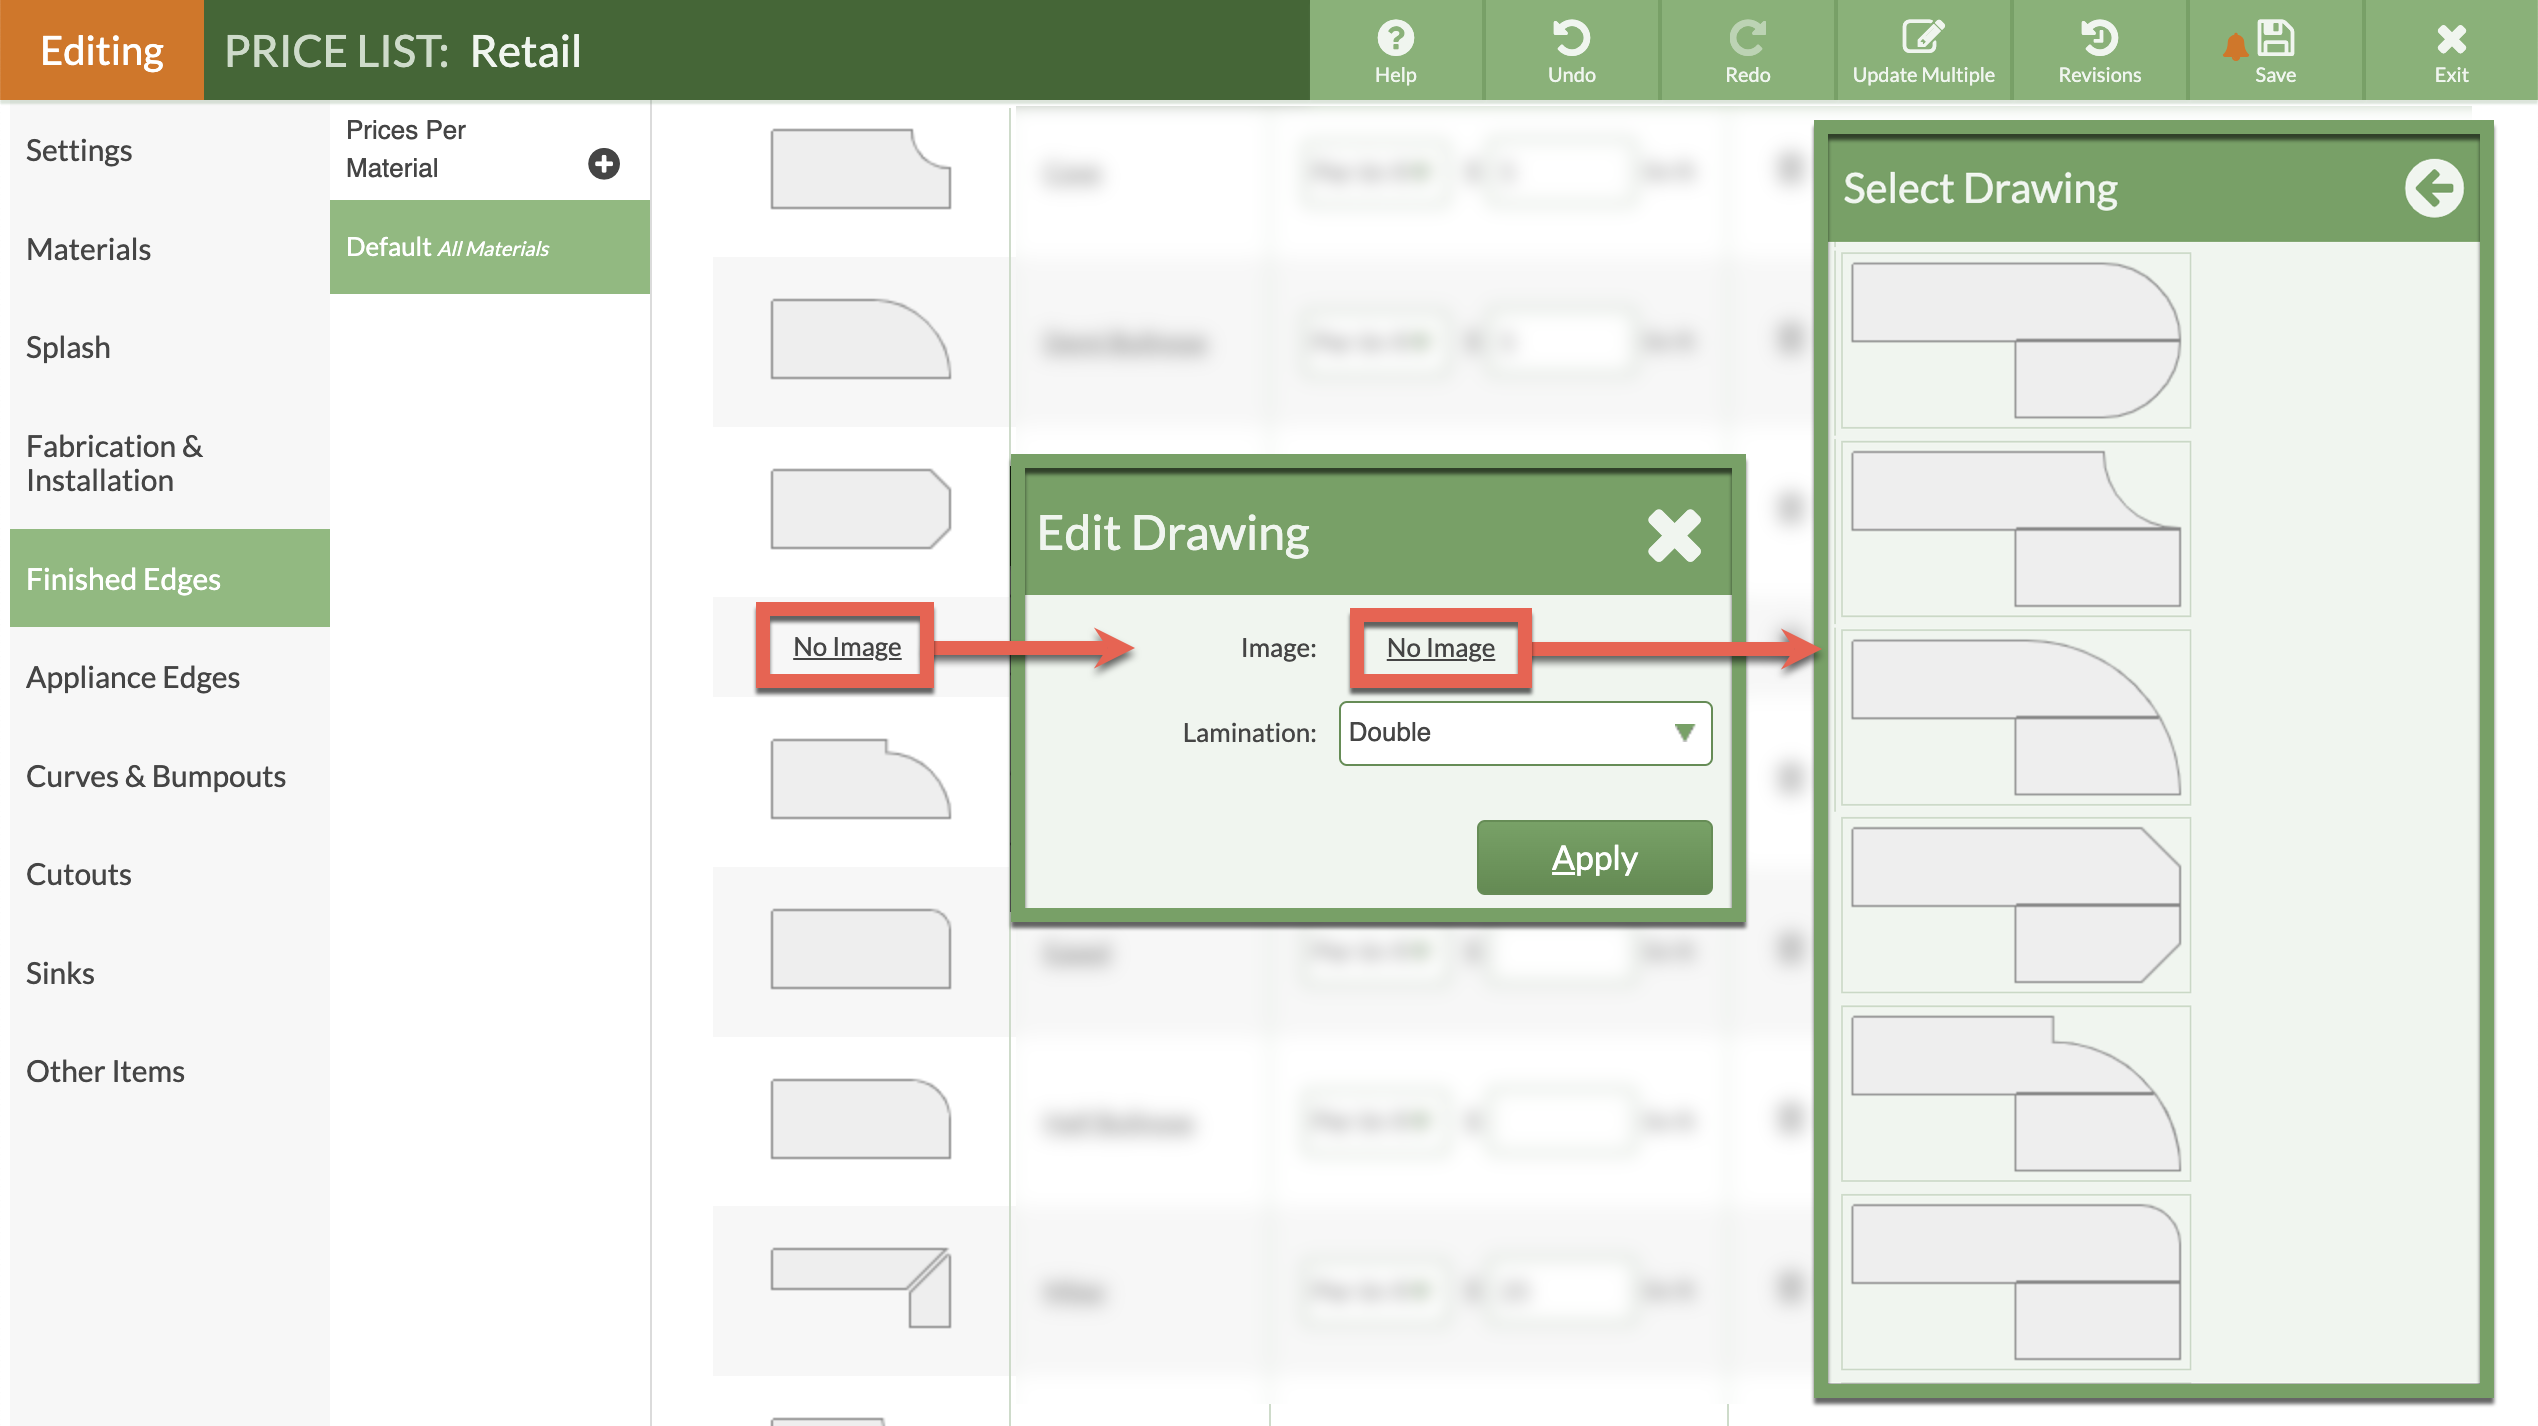
ADD FINISHED EDGES
- Click on Finished Edge.
- Click Add Finished Edge at the top of the current Finished Edges.
- Enter the Edge Names, one per line.

- The new edge is listed alphabetically. Click No Image to add a thumbnail image and a lamination if needed.
- Click No Image again to select a thumbnail from a list of scrollable options.