Need to run a seam down the long axis of a counter top? By default, seams are perpendicular to the Default Counter Depth edge of a countertop, whether it is drawn left to right, right to left, top to bottom, or bottom to top.
Seams can be displayed vertically or horizontally, but can not be mixed in the same countertop.
If you want the counter to appear horizontal in your customer drawing, rotate it in Step 1 after entering the dimensions.
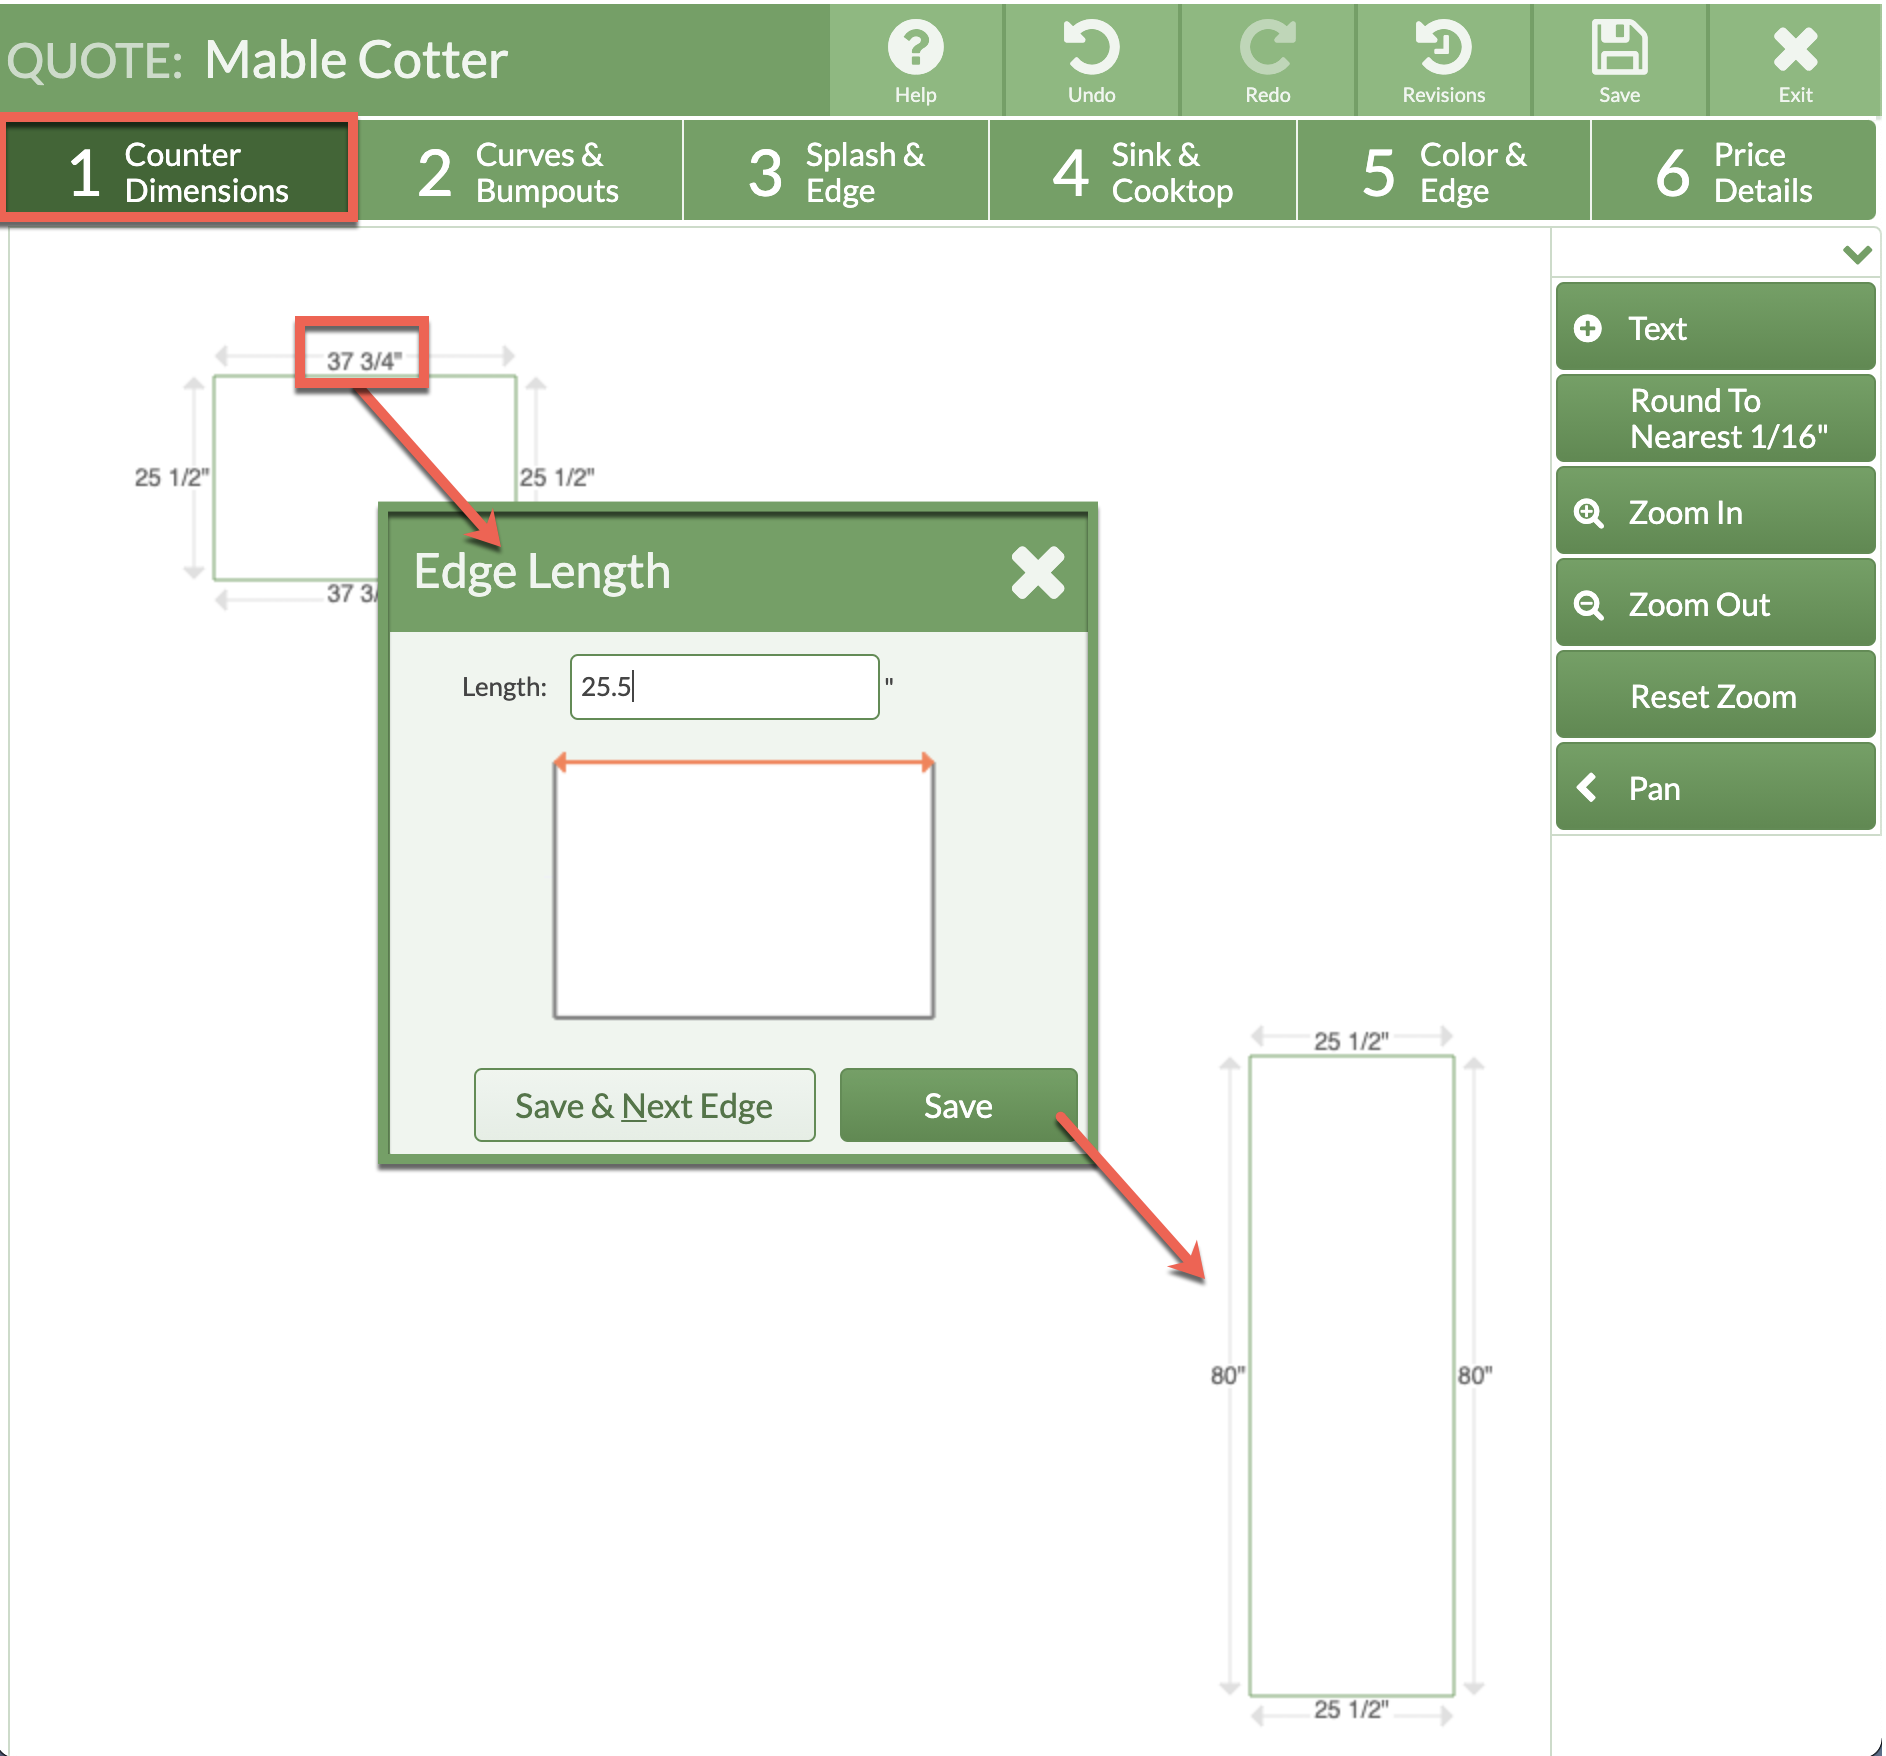
- In Step 1 draw a counter with the length of the final piece.
- Click on the longest edge and enter the smaller dimension (usually 25.5) of the countertop.
- Click Save & Next and enter the larger dimension so that the piece is taller than it is wide, then Save.
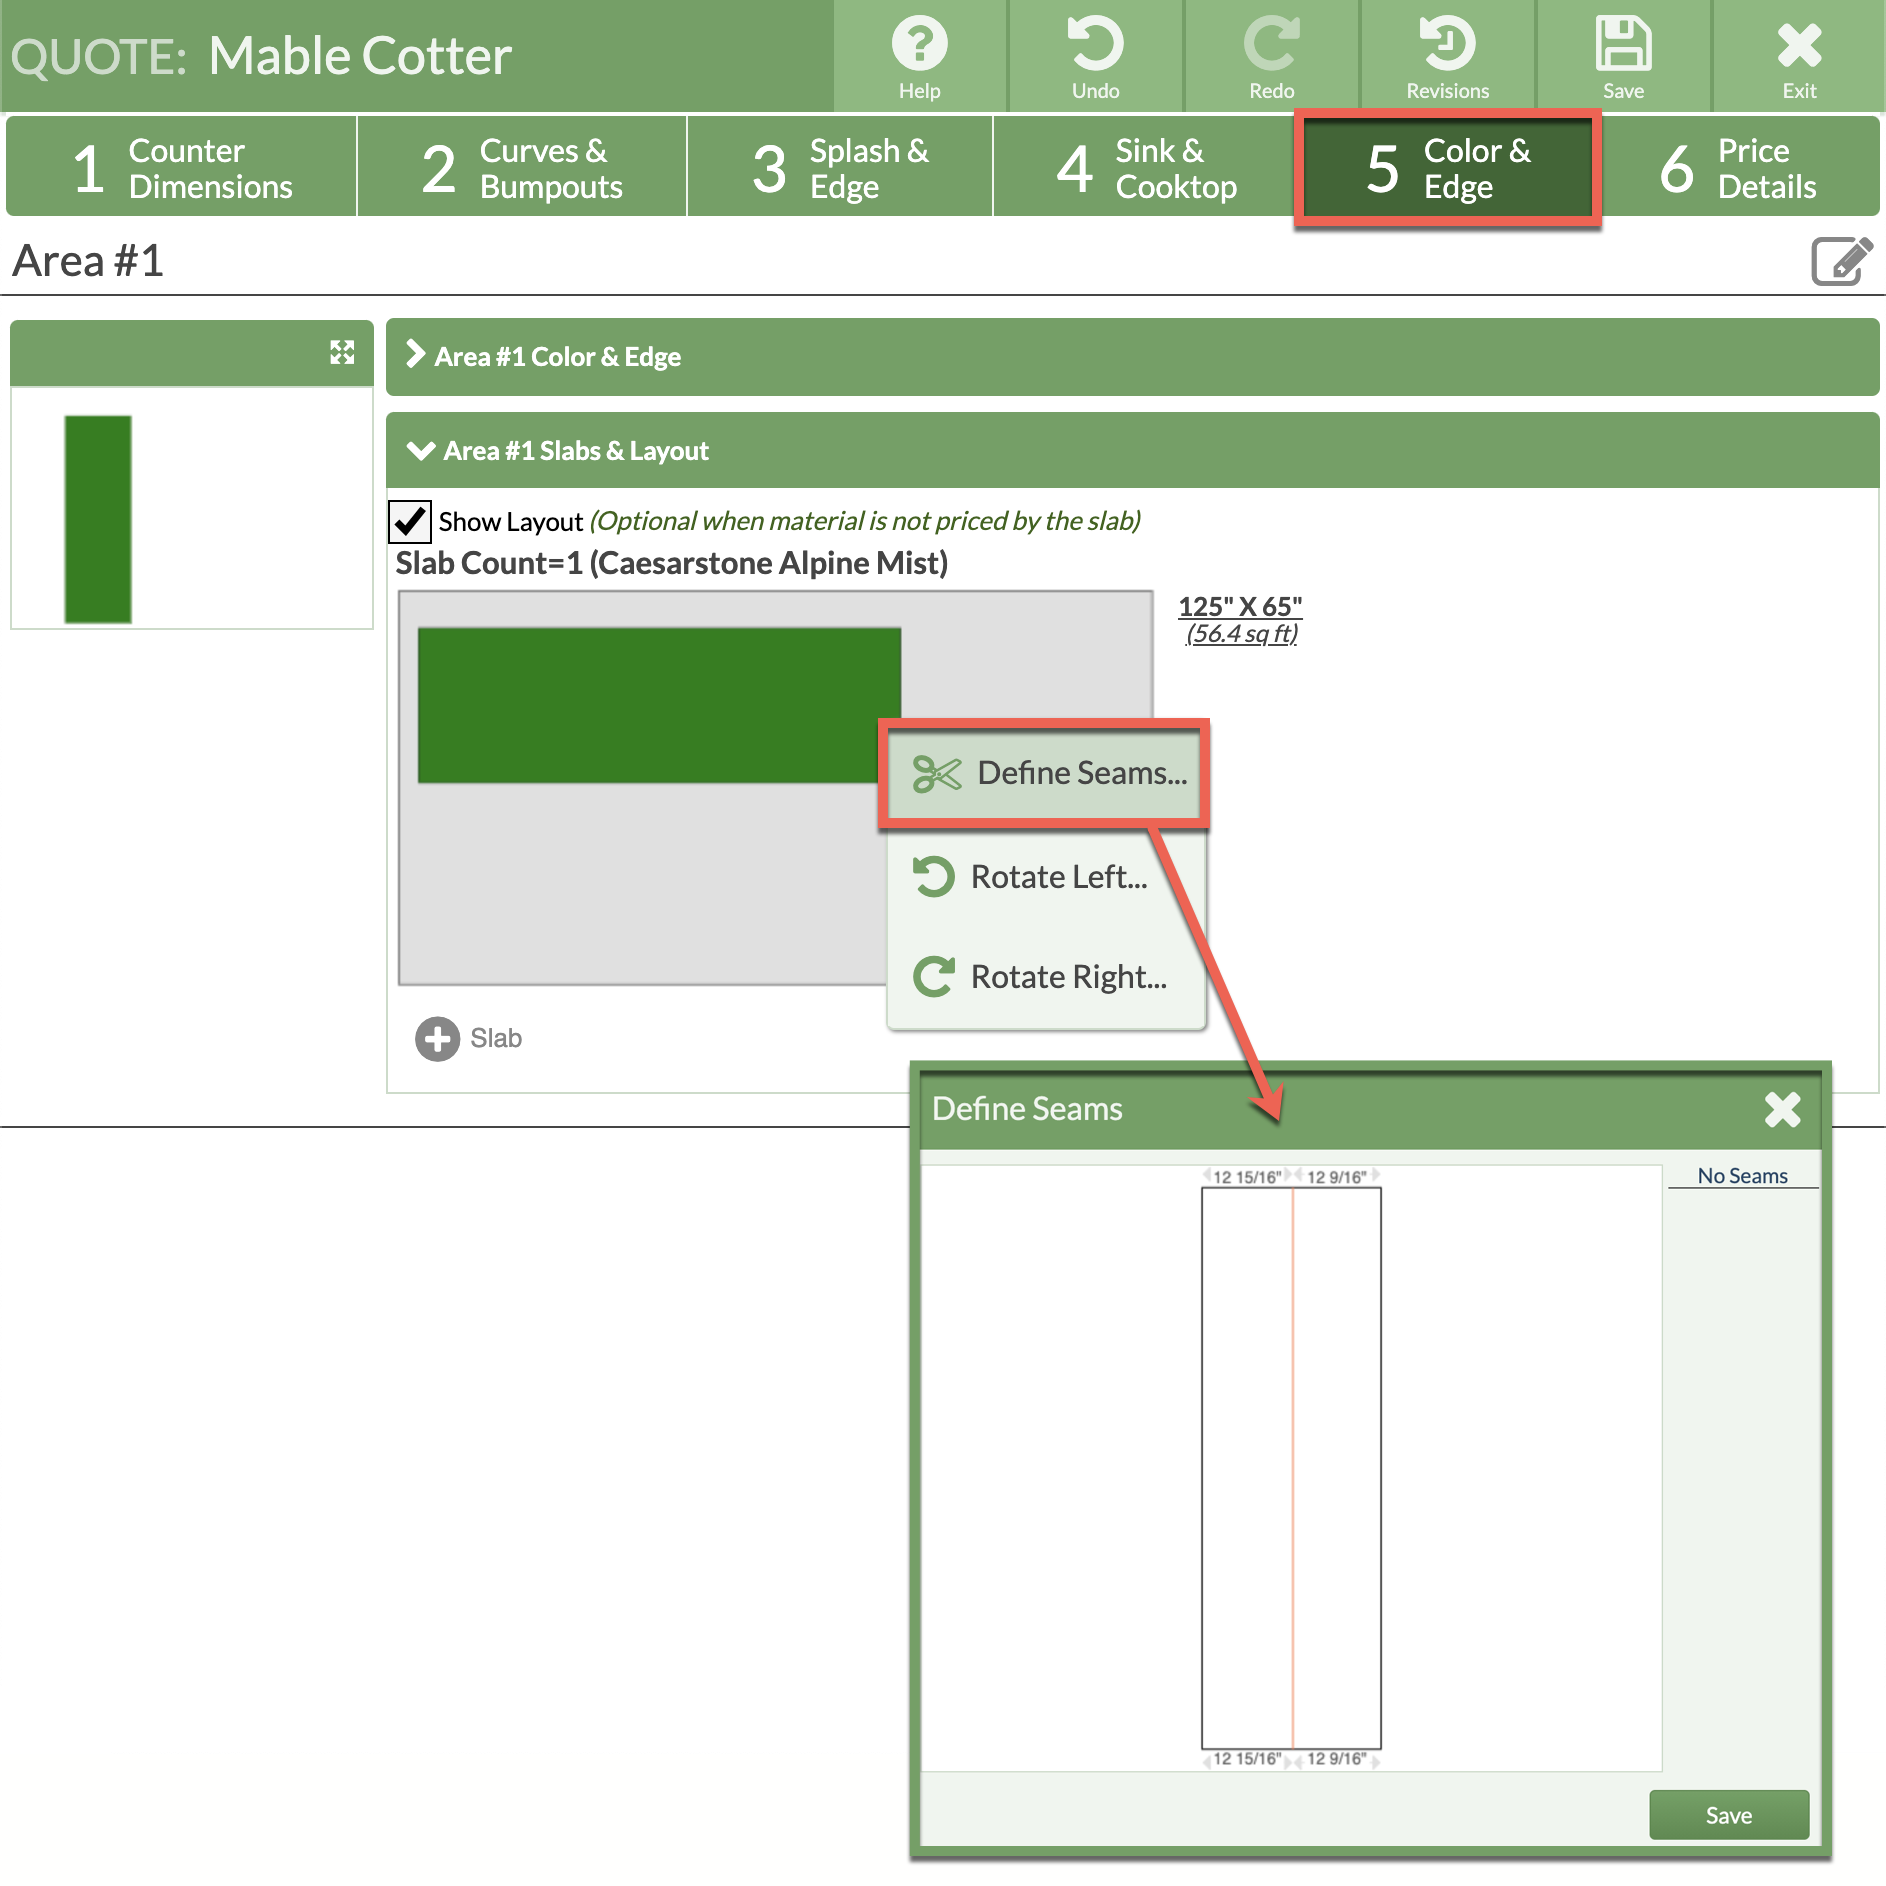
- In Step 5 and click on Area & Slab Layout. Click once on the counter and select Define Seams from the pop-up menu. The seam is now horizontal rather than vertical.