
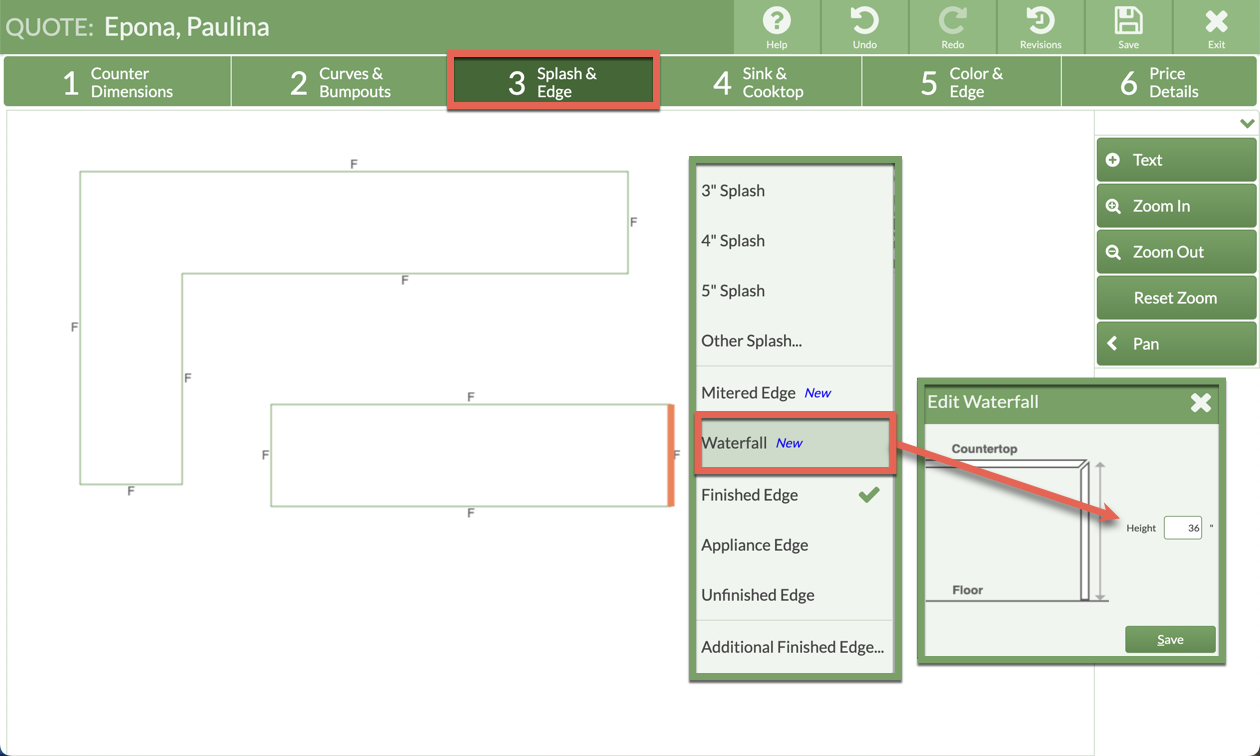
Do you need to create a Waterfall with Mitered Cuts? Waterfalls and their associated Mitered Cuts can be created in just a few clicks in Step 3 when drawing a Quote. This feature will create the Waterfall pieces and their associated cuts, no need to draw additional pieces.
Before using Waterfall Edges, enable the Waterfall Installation Charge in the Price List to have it automatically applied. It can be manually edited once enabled. If Waterfall Installation Charge is not enabled, it will not appear in Step 6.
Waterfall Material pricing is calculated based on the price of the Material selected in Step 5. Material pieces will be created and shown in Area & Slab Layout in Step 5.
Prices for Mitered Cuts and Waterfall Installation can be added to the Price List, or manually entered in Step 6. The total Linear Feet of the Mitered Cuts in Step 6 includes the edge between adjacent Mitered Cut and Waterfall.
When a CounterGo Order is converted to a Systemize Job, the imported Order Information includes the total Material needed for the countertop, and the Mitered Cuts total.
- Draw a countertop in Step 1.
- Click on the edge that will have the Waterfall > select Waterfall Edge > enter the Height.
- Go to Step 5 > Select a Product, Color, and Edge.
- Go to Step 6 > manually enter/edit prices for Waterfall Installation Charge and Mitered Cuts if not entered in the Price List.