Understand Multiple Edges
Understanding how to assign multiple edges to a countertop can be confusing at first. Multiple edges are created in Step 3 AND Step 5.
- In Step 3 you are telling the system if an edge has a finish style or does not, regardless of which edge style you will later choose. A finished edge is designated by the letter "F" and/or a number after it. An edge without a finished edge style is either Appliance or Unfinished.
- In Step 5 you tell the system which edge style to apply to each edge, regardless of the abbreviation in Step 3.
Each time you click on an edge in Step 3, if that edge finish will be different from the other edges on that countertop, select Additional Finished Edge from the pop-up menu.
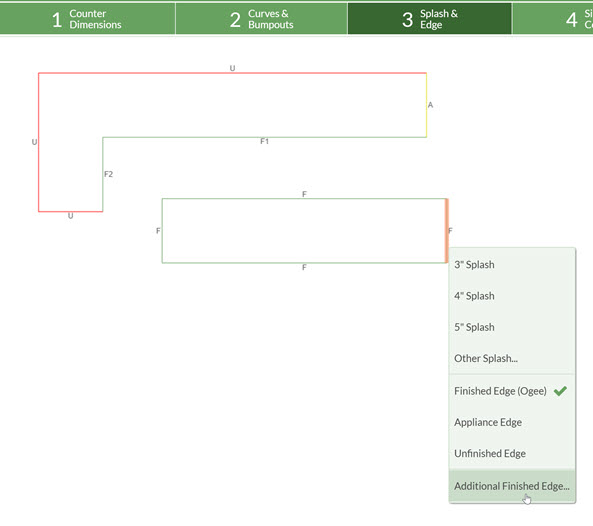
In the example below, there are edges with and without a finish style on the L-shaped counter and each edge of the island has a different edge style. That totals of 6 possible edges for the entire Quote.
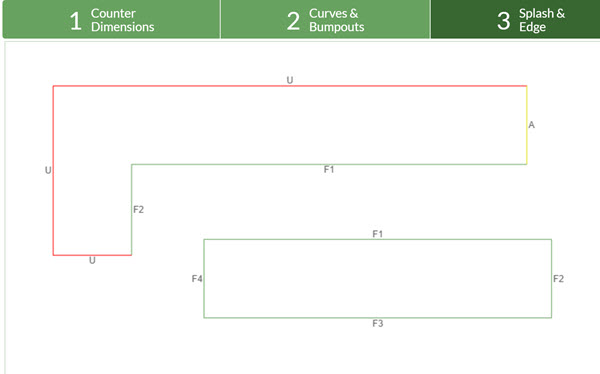
Move to Step 5 and select to use 6 different edge styles by clicking Add Edge.
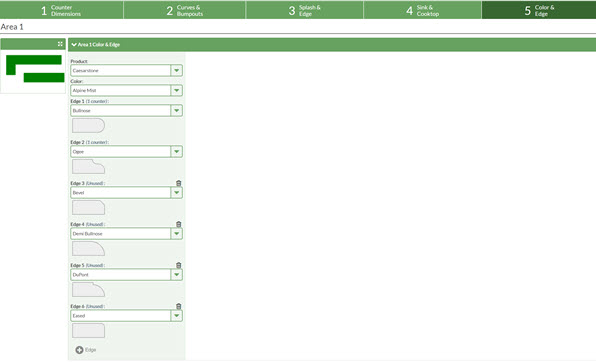
Next, the edge styles will need to be assigned to each countertop. What you assign as "F1" on one counter is not automatically assigned to the same "F1" on another piece. Think of each countertop as unique.
Click on the counter in the thumbnail and decide which edge style to assign to each different edge. In this example, the L-shaped counter is assigned first two edge styles on the list.
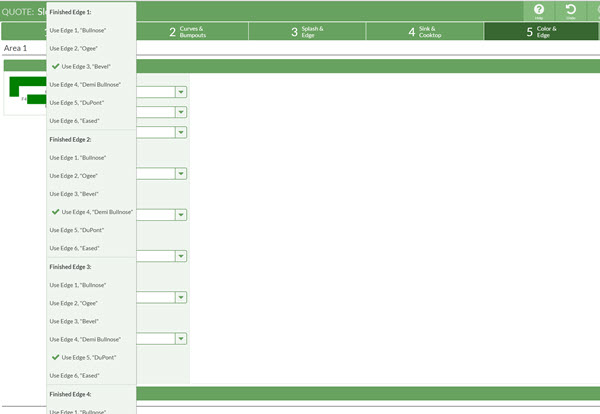
Because there are 4 different edges for the island selected in Step 3 (F1-F4), there are 4 edge styles to assign in Step 5. You can use any of the 6 edge styles you previously added, each one is listed.
Note: Once you have assigned each edge style to a Finished Edge, the list in Step 5 will show that each edge style has a counter(s) where it is used. if you see an edge style with "unused" next to the name, it has not been assigned.
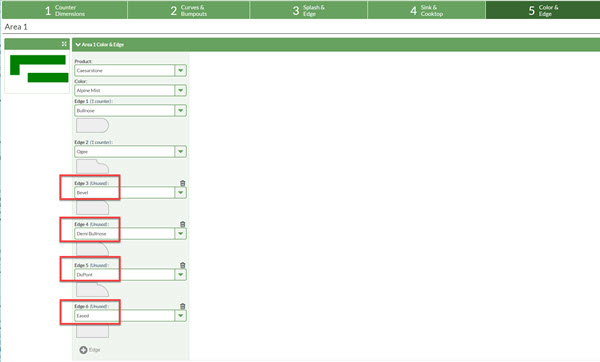
To assign them, just click on the thumbnail drawing and select that edge style from the list of options.
